
As an Amazon Associate I earn from qualifying purchases.
September Gardening Guide: 12 Must-Do Tasks for a Thriving Garden 🌻
As September unfolds, many gardeners focus on the bountiful harvest. However, this month offers more than just picking your produce. Join me, your gardening companion, as we embark on 12 essential tasks to ensure your garden continues to thrive and to prevent any issues from lingering into the next season.
In this transitional period between late summer and early autumn, your garden’s needs evolve. While the harvest is certainly a highlight, there are other critical jobs to consider if you want your garden to keep on giving. These tasks not only guarantee a flourishing garden but also help you avoid problems that might carry over into the next growing season.
Throughout this guide, we’ll explore each task in detail, providing you with valuable insights and practical advice to make your gardening journey smooth and successful. So, let’s roll up our sleeves and dive into these essential September gardening tasks. Your garden’s abundance awaits! 🌻
Task 1: Propagating Strawberries
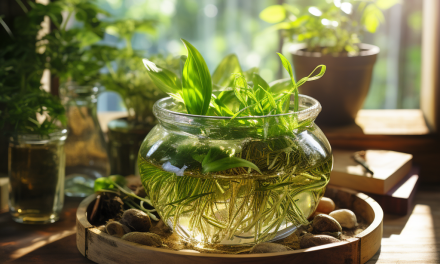
Late summer or early autumn is the perfect time to plant a new strawberry patch or expand an existing one. If your strawberry patch has faced challenges like mine with slugs, consider relocating it. Learn how to propagate new plants from runners for a fresh start.
As we transition from summer to autumn, it’s time to think about the sweet rewards of strawberries in your garden. While many gardeners primarily associate this season with harvest, it’s also an opportune moment to plan for the future. If you’ve been nurturing a strawberry patch, you may have noticed wiry stems known as “runners” emerging from your strawberry plants. These runners are nature’s way of offering you new strawberry plants without the need to purchase more.
Propagating Strawberry Runners:
Identify the Runners: After late summer, when the strawberries have finished producing fruits, you’ll often spot these runners with tiny plantlets along their length.
Gather Supplies: To propagate these plantlets, you’ll need thick-gauge wire, cut and bent into little U-shaped pins.
Pin Them Down: Gently pin the runners either directly into the soil or into pots filled with potting mix. Ensure that the plantlets make contact with the soil or mix.
Regular Care: Periodically check on the pinned runners to ensure they stay in place and keep them well-watered. These plantlets should take about a month to root into the potting mix.
Overwintering: Once they’ve established roots, cut them free from the mother plants and overwinter them in either a greenhouse or a cold frame. Come spring, they’ll be ready for planting.
If you find that your runners have already rooted into the soil and you want to relocate them, that’s not a problem. Carefully dig them up, pot them, and let them grow on. Overwinter these transplants for spring planting.
Propagating strawberries not only ensures a healthy future harvest but also allows you to expand your strawberry patch inexpensively. It’s a simple yet rewarding task that promises the sweet taste of success in the seasons to come.
Task 2: Elevating Winter Squash and Pumpkins
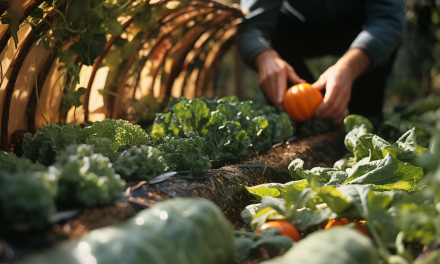
To prevent damp soil from causing fruit rot, lift developing winter squash and pumpkins off the ground and place a tile or slate underneath them. This simple trick can protect your harvest.
As the transition from summer to autumn unfolds, it’s essential to pay special attention to your growing winter squash and pumpkins. These hearty vegetables are a staple of autumn and winter meals, but they require some care to ensure they reach their full potential.
One common issue that can affect these crops is fruit rot caused by contact with damp soil. To safeguard your precious harvest and ensure your winter squash and pumpkins ripen beautifully, consider the following technique:
Elevating Winter Squash and Pumpkins:
Identify Developing Fruits: As your winter squash and pumpkins begin to form and grow, keep an eye on them. Look for any signs of contact with the ground, which can lead to rot.
Prepare Tiles or Slates: Gather a collection of tiles or slates, preferably ones that are clean and free from any contaminants.
Lift and Support: Carefully lift each developing fruit and place a tile or slate underneath it. Ensure that the skin is no longer in contact with the damp soil.
By elevating your winter squash and pumpkins, you reduce the chances of fruits spoiling or rotting due to moisture. This straightforward technique can make a significant difference in the quality of your harvest.
As autumn progresses, and the days grow cooler, you’ll be able to enjoy the fruits of your labor, knowing that your winter squash and pumpkins are ripening beautifully and are well-protected from damp soil.
Feel free to use this section in your blog post, and if you have any specific changes or additions in mind, please let me know.
Task 3: Seed Saving for Self-Sufficiency
Towards the end of the month, allow some plants, like beans and tomatoes, to fully mature for seed saving. Discover the art of preserving seeds from various vegetables, ensuring a sustainable source for future planting.
As the gardening season draws to a close, it’s time to embrace self-sufficiency in your garden. One of the most rewarding practices for a dedicated gardener is seed saving. By saving seeds from your best-performing plants, you not only ensure a continuous source of future crops but also establish a deeper connection with your garden’s life cycle.
Here are some steps to get you started on the journey of seed saving:
1. Identifying the Right Candidates:
- Towards the end of September, select healthy, robust plants that you want to save seeds from. Beans, tomatoes, peppers, and lettuce are excellent candidates for seed saving.
2. Allowing Seeds to Mature:
- Leave some of these chosen plants untouched as they continue to grow. Allow the fruits to fully ripen on the plant.
3. Harvesting Seeds:
- Once the fruits have reached maturity, they will naturally begin to dry and change color. For instance, beans may turn papery, and tomatoes will become mushy.
4. Extracting Seeds:
- Extract the seeds from the mature fruits. For beans, simply shell the beans and bring them indoors for further drying. For tomatoes, scoop out the seeds along with the surrounding gel-like substance and place them in a container.
5. Drying and Storing Seeds:
- Spread the seeds in a single layer on a paper towel or a screen and let them air dry completely. Once dry, store the seeds in a cool, dry place in labeled envelopes or containers.
It’s worth noting that some vegetables like onions, leeks, chard, and carrots won’t produce seeds until the following season. For these, you’ll need to overwinter a few plants so they can flower and produce seeds next year.
By saving seeds from your garden, you not only reduce expenses but also ensure that your crops are well-adapted to your specific growing conditions. Self-saved seeds are fresher, more cost-effective, and uniquely suited to your garden, making them a valuable asset for any dedicated gardener.
Task 4: Clearing and Preparing for the Next Crop
With the growing season ending for some crops, it’s time to clear them quickly to make room for new plantings or soil improvement. Explore the process of clearing, weeding, and enriching your garden beds.
As the season shifts from summer to autumn, your garden undergoes a transformation. Some crops reach the end of their productive cycle, creating an opportunity for you to prepare your garden beds for the next planting season. Clearing and rejuvenating your garden beds is a crucial task to ensure the ongoing success of your garden.
Here’s a step-by-step guide on how to clear and prepare your garden beds:
1. Clearing the Old Crop:
- Begin by removing all remnants of the old crop. Pull out any remaining plants, including their roots, and place them in your compost heap.
2. Removing Weeds:
- While clearing, be sure to pick through any traces of the old crop, along with any annual weeds that may have sneaked in. These make excellent additions to your compost pile.
3. Adding Organic Matter:
- After clearing away the old crop and weeds, it’s time to improve your soil. Add organic matter to your garden beds. Aim for a depth of at least an inch or 3 cm if possible. Well-rotted manure is an excellent choice for this purpose.
4. Preparing for the Next Crop:
- If you’re planning to plant a new crop immediately, prepare the soil accordingly. Mix the organic matter into the soil to ensure it’s well-distributed.
5. Planting Your Next Crop:
- Once your garden bed is prepared, it’s time to plant your next crop. Choose vegetables or flowers suitable for the season and your growing region. In this guide, I’m planting beautiful chard that will provide harvests throughout the winter and into spring.
Remember to consider the specific needs of the plants you’ll be growing in the next season, including spacing and sunlight requirements.
Clearing and preparing your garden beds is an essential step to maintain healthy soil and optimize the growing space in your garden. By following these steps, you’ll set the stage for a successful and productive gardening season ahead.
Task 5: Planting Spring-Maturing Cabbage
Consider making space for spring-maturing cabbage in your garden. These hardy plants benefit from the frozen conditions of winter, which makes the leaves sweeter. Plant seedlings and protect them from pesky pigeons.
While autumn ushers in cooler temperatures and shorter days, it also presents an opportunity to plan for the future. One vegetable worth making space for in your garden is spring-maturing cabbage. These resilient plants not only thrive in winter’s chill but also develop sweeter leaves as a result of the frost.
Here’s how to go about planting spring-maturing cabbage:
1. Preparing the Garden Bed:
- Choose a well-drained, sunny location in your garden bed for planting cabbage seedlings. Ensure the soil is enriched with compost or well-rotted manure.
2. Selecting Seedlings:
- Look for healthy cabbage seedlings at your local nursery or garden center. Spring cabbage varieties are typically suitable for planting in early autumn.
3. Planting Seedlings:
- Dig small holes in your prepared garden bed, spacing them about 12 inches or 30 cm apart in both directions. Plant the cabbage seedlings in these holes, ensuring they are at the same depth as they were in their pots.
4. Protection from Pigeons:
- Cabbage plants can be a favorite snack for pigeons. To protect them, consider using bird netting or mesh to create a barrier around your cabbage patch.
5. Watering and Care:
- Keep the soil consistently moist, and provide ample sunlight for your cabbage seedlings to thrive. Watering in the morning allows any moisture on the leaves to dry before evening, reducing the risk of fungal diseases.
Spring cabbage not only survives but thrives in the freezing conditions of winter, resulting in sweeter and more flavorful leaves. By planting now, you’ll be rewarded with fresh cabbage when other vegetables are scarce, extending your harvest well into spring.
Task 6: Prepare for Cooler Nights
As the evenings grow cooler, remember to shut greenhouse doors and windows by late afternoon to retain daytime heat. Extend the ripening season for peppers and tomatoes by trapping warmth.
With the arrival of autumn, we can expect cooler evenings and the occasional nip in the air. To ensure your garden remains a warm and nurturing environment for your plants, it’s essential to prepare for these cooler nights. This is particularly important if you have a greenhouse, as it can make a significant difference in extending the ripening season for crops like peppers and tomatoes.
Here’s what you need to do to prepare for cooler nights in your garden:
1. Greenhouse Care:
- If you have a greenhouse, it’s essential to keep a close eye on the temperature inside. By late afternoon, begin closing greenhouse doors and windows to trap the daytime heat. This practice can help maintain a stable and warm environment for your plants during the cooler evenings.
2. Cold Frames and Covers:
- If you use cold frames, mini greenhouses, or covers for your garden beds, apply the same principle. Close them up in the late afternoon to retain warmth and create a more favorable climate for your plants.
3. Protection for Tender Crops:
- Pay special attention to crops that are sensitive to colder temperatures, such as peppers and tomatoes. By providing a warmer environment during the night, you can extend the ripening season and maximize your harvest.
4. Proper Ventilation:
- While sealing off your garden structures is essential for retaining heat, it’s equally important to ensure proper ventilation during the day to prevent overheating.
By taking these precautions, you can maintain a more favorable climate for your plants during the transition from summer to autumn. This extra care will not only extend your harvest season but also protect your crops from the potentially damaging effects of cooler nights.
Task 7: Sow Cover Crops or Green Manure
Boost soil fertility, suppress weeds, and improve soil structure during the off-season by sowing cover crops or green manure. Explore suitable options for your climate and how to incorporate them into your garden.
As we transition from the active gardening season to the quieter winter months, it’s essential to consider how best to care for your garden’s soil. One highly effective and eco-friendly way to do this is by sowing cover crops or green manure. These crops offer a range of benefits, including improving soil fertility, suppressing weeds, and enhancing soil structure, all while your garden beds lie fallow.
Here’s a guide to sowing cover crops or green manure in your garden:
1. Choose the Right Cover Crops:
- Select cover crops that are well-suited to your climate. In temperate regions, options like mustard, winter tares or vetch, grazing rye, and field beans are popular choices. These crops can be sown in late summer or early autumn.
2. Interplanting with Established Crops:
- Some cover crops can be sown in between already established crops. This technique allows the cover crop to grow alongside your main crops. For instance, nitrogen-fixing trefoil can be sown among your existing kale plants.
3. Mat Formation and Winter Growth:
- As these cover crops grow, they’ll form a protective mat over your garden bed. This mat not only helps suppress weeds but also adds organic matter to the soil.
4. Incorporating in Spring:
- In spring, as your garden begins to awaken, you can easily incorporate these cover crops by turning them into the soil. This process enriches the soil with nutrients and enhances its structure.
Cover crops are an excellent, low-tech solution to maintaining healthy soil during the off-season. They provide an eco-friendly alternative to chemical fertilizers and contribute to the long-term health of your garden. By sowing cover crops or green manure, you’re investing in the future fertility and productivity of your garden.
Task 8: Harvesting Late-Season Potatoes
Before slugs can reach them, dig up the last of your spring-planted potatoes. Properly store these potatoes in a cool, dark, and airy place to enjoy them throughout the season.
Late summer is a time of abundance, and if you’ve planted potatoes in the spring, it’s time to reap the rewards of your labor. However, you’ll want to act swiftly to harvest your potatoes before slugs or other pests have a chance to damage them. Once harvested, storing your potatoes properly ensures they stay fresh and delicious throughout the season.
Here’s how to harvest and store late-season potatoes:
1. Identifying Readiness:
- Start by checking if your potatoes are ready for harvest. This is typically when the foliage begins to die back and turn yellow. It’s a sign that the potatoes have reached maturity.
2. Digging Up Potatoes:
- Gently dig up the potato plants, being careful not to damage the tubers. Use a garden fork or shovel to lift the plants from the soil.
3. Drying the Potatoes:
- After digging up the potatoes, leave them on the soil surface for a few hours. This allows the skins to dry, making them less susceptible to damage during storage.
4. Proper Storage:
- Store your potatoes in breathable sacks or baskets in a cool, dark, and airy place. A basement, cellar, or cool pantry is ideal. Avoid storing them in the refrigerator, as this can change the potato’s texture and flavor.
Late-season potatoes offer a delightful addition to your autumn and winter meals. By harvesting and storing them correctly, you’ll have access to your homegrown potatoes for a more extended period, allowing you to enjoy the taste of your garden well into the season.
Task 9: Continuous Harvest of Warm-Season Crops
In the late summer months, continue to harvest warm-season staples like tomatoes, beans, and zucchini to prolong their productivity. Frequent picking not only ensures a steady supply but also encourages further production.
As summer fades into early autumn, your garden is still teeming with warm-season crops that require attention. While some crops are winding down, others, like tomatoes, beans, and zucchini, continue to produce abundantly. To make the most of these late-season treasures, it’s essential to maintain a routine of regular harvesting.
Here’s how to ensure a continuous harvest of warm-season crops:
1. Frequent Picking:
- Make it a habit to check your garden daily for ripe produce. Harvest tomatoes, beans, and zucchini as soon as they reach maturity. Frequent picking not only ensures a steady supply but also encourages the plants to continue producing.
2. Ideal Harvest Times:
- Harvest tomatoes when they are fully colored and have a slight give when gently squeezed. Beans should be picked while they are still tender, and zucchini should be harvested when they are young and tender to avoid becoming overly large and woody.
3. Use Pruning Techniques:
- For tomatoes, consider pruning away excess foliage to redirect the plant’s energy toward ripening existing fruits. This can help accelerate the ripening process.
4. Proper Storage:
- Store your harvested produce in a cool and dark place. Tomatoes should be stored at room temperature until fully ripe, after which they can be transferred to the refrigerator.
By continuing to harvest your warm-season crops diligently, you can enjoy a steady stream of garden-fresh produce well into the transition from summer to autumn. This practice not only maximizes your harvest but also ensures that you savor the full flavor of your garden’s bounty.
Task 10: Preserving Your Garden’s Bounty
As the end of the growing season approaches, seize the opportunity to preserve some of your garden’s abundance. Explore various methods like canning, freezing, and dehydrating to capture the essence of summer for enjoyment during the colder months.
As the gardening season nears its conclusion, there’s no better time to celebrate your garden’s bounty and ensure that its flavors linger through the colder months. Preserving your produce allows you to enjoy the taste of summer even when the garden is no longer in full bloom. There are various methods to preserve your garden’s abundance, including canning, freezing, and dehydrating.
Here’s an overview of how to preserve your garden’s bounty:
1. Canning:
- Canning involves sealing food in airtight containers, typically jars, after heating it to a high temperature. This method is ideal for preserving jams, pickles, and sauces. Make sure to follow canning recipes and safety guidelines to ensure your preserved goods remain safe to eat.
2. Freezing:
- Freezing is a straightforward method for preserving fruits and vegetables. Blanching vegetables before freezing helps retain their color and flavor. Store items in airtight freezer bags or containers. Be sure to label and date everything for easy identification.
3. Dehydrating:
- Dehydrating removes moisture from food, preserving it in a dried state. You can use a dehydrator or an oven set at a low temperature. Dehydrated fruits, vegetables, and herbs are great for snacking or adding flavor to your dishes.
4. Pickling:
- Pickling is a delightful way to preserve vegetables. You can create various pickling solutions, including vinegar-based ones, to pickle cucumbers, beets, peppers, and more.
5. Jam and Jelly Making:
- Transform your garden’s fruits into delicious jams and jellies. These can be spread on toast, used as dessert toppings, or added to recipes.
Preserving your garden’s bounty not only reduces waste but also allows you to savor the tastes of summer well into the colder months. It’s a rewarding endeavor that connects you to the cycles of the garden and brings the joy of homegrown flavors to your table.
Task 11: Pickling Cucumbers for a Tangy Treat
Let’s dive into the delightful world of pickling cucumbers. Learn how to create your own tangy cucumber pickles that will add a burst of flavor to your meals. Pickling is a fantastic way to preserve the crispness and taste of cucumbers well into the season.
Pickling cucumbers is a culinary adventure that can transform these crunchy vegetables into tangy, flavorful treats. Whether you enjoy them on sandwiches, as a side dish, or straight from the jar, homemade cucumber pickles are a delightful addition to your pantry. Here’s how you can create your own tangy cucumber pickles:
1. Gather Your Ingredients:
- You’ll need cucumbers, distilled white vinegar, water, salt, sugar, garlic cloves, and peppercorns. You can also add herbs and spices like dill, mustard seeds, or red pepper flakes for extra flavor.
2. Prepare Your Cucumbers:
- Wash and slice your cucumbers into fairly thin rounds. You can also leave them whole or cut them into spears, depending on your preference.
3. Pack the Jars:
- Pack the sliced cucumbers into clean, heat-proof canning or mason jars, leaving about half an inch or a centimeter of headroom at the top.
4. Create the Pickling Liquid:
- In a saucepan, combine distilled white vinegar, water, salt, sugar, garlic cloves, and peppercorns. You can customize the flavor by adding herbs and spices of your choice. Bring this mixture to a rolling boil, ensuring that all the ingredients are fully dissolved.
5. Pour the Pickling Liquid:
- Once the pickling liquid has cooled slightly, pour it into the jars over the cucumbers. Ensure that some of the peppercorns and garlic find their way into each jar.
6. Add Fresh Herbs:
- To finish off, add a few sprigs of fresh garden dill to each jar. Ensure that the dill is not too hot when added to maintain its freshness and color.
7. Seal and Refrigerate:
- Screw on the lids and let the jars cool down for about an hour. After that, place them in the refrigerator. The pickles will be ready to eat within a couple of days, but their flavor will continue to improve with time.
Homemade cucumber pickles offer a tangy burst of flavor that can enhance your sandwiches, burgers, and salads. They’re also a delightful accompaniment to cheese platters or charcuterie boards. The beauty of making your own pickles is that you can customize them to suit your taste, experimenting with different herbs and spices to create your signature pickle recipe.
Task 12: Trimming Hedges and Shrubs
With the summer’s growth in full swing, it’s essential to trim your hedges and shrubs. Not only does this keep them looking tidy, but it also enhances their ability to filter air pollution and reduce background noise. Follow these steps to maintain healthy and lush hedges and shrubs:
1. Select the Right Time:
- Choose a suitable time for trimming your hedges and shrubs. Typically, this should be done when they are actively growing, which is often during the summer months.
2. Check for Active Nests:
- Before you start trimming, inspect your hedges and shrubs for active bird nests. Avoid disturbing any nesting birds, as it’s essential to protect wildlife in your garden.
3. Gather the Right Tools:
- Ensure you have the appropriate tools for the job. Hedge trimmers or pruners are commonly used for this task. Safety gear like gloves, goggles, and sturdy boots are essential when using powered tools.
4. Start Trimming:
- Begin trimming by cutting into new growth that’s less than a year old. Focus on removing straggly or overgrown branches to maintain the desired shape and size of your hedges and shrubs.
5. Consider Formal Hedges:
- If you have formal hedges, you can use a stringline to guide your trimming for a neater appearance.
6. Monitor Progress:
- Step back periodically to assess your progress and ensure an even trim. Pay attention to areas that need further attention.
7. Dispose of Clippings:
- After trimming, collect the clippings. You can lay down old tarpaulin to make this task easier. Once collected, dispose of the clippings in your compost heap or green waste bin.
Trimming your hedges and shrubs not only enhances their aesthetics but also promotes healthy growth. Well-maintained hedges can act as natural barriers, filter pollutants from the air, and reduce noise pollution. Additionally, this task keeps your garden looking well-kept and inviting.
Conclusion and Recap
As September unfolds, your garden presents exciting opportunities and tasks that will keep you engaged and rewarded. Let’s take a moment to recap the essential tasks we’ve covered in this comprehensive garden checklist for September:
Planting Strawberries: Consider relocating or propagating new strawberry plants from runners to refresh your strawberry patch.
Protecting Winter Squash and Pumpkins: Elevate developing winter squash and pumpkins to prevent damp soil rotting the fruits, ensuring they ripen beautifully.
Saving Your Own Seeds: Towards the end of the month, allow some crops to mature fully so you can save seeds for the following season.
Clearing and Amending Soil: Clear out spent crops, remove weeds, and enrich your soil with organic matter to prepare for the next planting.
Planting Spring-Maturing Cabbage: Make space for spring-maturing cabbage by planting seedlings and protecting them from garden pests.
Managing Garden Structures: Securely close greenhouse doors and windows to trap warmth during cooler evenings, helping your crops ripen.
Sowing Cover Crops or Green Manure: Enhance soil fertility and structure by sowing cover crops or green manure. Choose options suitable for your climate and garden.
Harvesting Late-Season Potatoes: Dig up spring-planted potatoes to ensure they don’t fall victim to slugs and store them properly for extended enjoyment.
Continuous Harvest of Warm-Season Crops: Keep picking tomatoes, beans, and zucchini to maximize their productivity before the growing season ends.
Preserving Your Garden’s Bounty: Explore various preservation methods like canning, freezing, and dehydrating to savor the flavors of summer throughout the colder months.
Pickling Cucumbers for a Tangy Treat: Dive into the world of pickling cucumbers to create your own tangy delights that add zing to your meals.
Trimming Hedges and Shrubs: Maintain tidy and healthy hedges and shrubs, enhancing their ability to filter air pollution and reduce background noise.
Sowing Late-Season Crops for a Winter Harvest: Sow winter-hardy salads and Asian greens for a fresh harvest even as the weather cools.
With these tasks at hand, your garden will thrive well into autumn and provide you with a bountiful harvest. Embrace the changing seasons and the joys of tending to your garden, and remember, every effort you put in now will be rewarded in the seasons to come.
Thank you for joining us on this journey through your September garden checklist. May your garden continue to flourish, and may your efforts bring you endless joy and delicious homegrown produce.
Amazon and the Amazon logo are trademarks of Amazon.com, Inc, or its affiliates.AMAZON AFFILIATE DISCLOSURE The Garden Whisperer Tips blog is a participant in the Amazon Services LLC Associates Program, an affiliate advertising program designed to provide a means for sites to earn advertising fees by advertising and linking to Amazon.com. As an Amazon Associate, we earn from qualifying purchases. Some of the links on this blog are affiliate links, and if you go through them to make a purchase, we will earn a commission at no extra cost to you. AFFILIATE MARKETING AND ADVERTISEMENT TRANSPARENCY At Garden Whisperer Tips, we believe in full transparency with our readers. We participate in multiple affiliate marketing programs, and some of the links on this blog may be affiliate links. This means we may earn a commission if you click on the link or make a purchase using the link. We also host advertisements on our blog, which helps us generate revenue. Rest assured, our editorial content is not influenced by advertisers or affiliate partnerships.


