
Hello, my fellow gardening enthusiasts! 🌱 It’s Gayle here from “Gardener Whisperer Tips,” and I’m absolutely thrilled to have you join me on this green adventure. Grab your gardening gloves and get ready because today, we’re diving deep into the world of growing garlic, a crop that holds a special place in the hearts of gardeners worldwide. ❤️
Now, I know that garlic might seem a tad bit mysterious, especially if you’re a first-time grower. But fear not! 🙌 I’ve spent years experimenting with various garlic varieties, techniques, and styles, and I’m here to share all that garlic wisdom with you. So, let’s embark on this journey together and unlock the secrets of cultivating the perfect garlic crop right in your own backyard.
Understanding Garlic Varieties
Garlic Varieties
Garlic, as you may already know, comes in a delightful array of varieties. 🌰 Some may look a bit frumpy, while others exude elegance, but they all fall into two major categories. Let’s dive into these categories and discover the subtle differences.
Soft Neck Garlic Characteristics
The soft neck garlic variety, though it may not win any beauty contests, is a familiar sight at grocery stores. It’s known for its numerous cloves, making it a practical choice for many recipes. 🍝 In addition to its high yield, soft neck garlic thrives in warmer climates, making it a great option for regions like my own sunny San Diego. Plus, it boasts an impressive storage life of up to a year! 🌞 The only trade-off is that its flavor profile tends to be less pungent.
Hard Neck Garlic Characteristics
On the other hand, hard neck garlic varieties are like the celebrities of the garlic world. 🌟 They often have larger cloves and can withstand the colder climates of the north. If you’re a northern gardener, you’ll want to lean towards hard neck garlic. Not only do they look stunning in your garden, but they also offer a bit more flavor, spice, and pungency. 🌶️ The only downside is that they store for a slightly shorter period, around 6 to 8 months.
Now, don’t worry if you’re in a warmer climate like me and yearn for that robust garlic flavor. 🌴 I’ve got some tricks up my sleeve to help you grow hard neck garlic successfully, even in the warmest of regions. But before we dive into those secrets, let’s explore an essential aspect of hard neck garlic—vernalization.
Garlic Varieties & Vernalization
Garlic in a Warmer Climate and Vernalization
In a warmer climate like sunny San Diego, planting hard neck garlic straight into the ground might not yield the best results. Why? Well, hard neck garlic has a unique requirement—it craves cold exposure. ❄️ In colder regions, this exposure lasts about 2 to 3 months at temperatures of 40 to 45°F, but I don’t have that luxury in my climate.
So, here’s the trick I promised earlier: we need to trick our garlic into believing it has experienced that chilly period. 🧙♂️ How? By placing those gorgeous garlic cloves into a paper bag and tucking them into your refrigerator’s crisper drawer. Keep an eye on them to ensure they don’t mold or rot, and let them sit in there for approximately 8 to 10 weeks. Pro tip: Please don’t even think about the freezer—it’ll do more harm than good!
Now that we’ve got our garlic all chilled and ready, it’s time to explore your garden bed options to ensure a thriving garlic crop. Let’s continue our garlic-growing adventure by choosing the perfect garlic bed.
Choosing the Perfect Garlic Bed
Preparing Your Garlic Bed for Success
Your garlic’s home sweet home matters more than you might think. When selecting a spot to grow your garlic, there are two critical factors to consider: sunlight and soil. ☀️🌱
Sunlight and Soil Considerations
Garlic absolutely adores full sun exposure—it’s like a day at the spa for these bulbs. If you’re in a toasty climate, a little partial shade during the hottest parts of the day won’t hurt. In fact, it can keep your garlic from breaking a sweat.
As for the soil, it’s all about that loose, well-draining mix. 🌱 Last year, I made the mistake of planting garlic in my heavy native clay soil, and it led to a dreaded garlic rust infestation. 🤦♀️ It nearly wiped out my garlic dreams! So, this year, I’ve chosen a bed that I’m preparing with lots of love, compost, and careful soil work. Remember, garlic can’t get enough of compost—it’s like its favorite meal.
Now that we have our garlic bed all prepped and ready, we’re halfway to garlic glory.
Planting Garlic Like a Pro
Alright, my fellow garden enthusiasts, we’re now at the exciting stage—planting our garlic cloves. 🌱 Remember, this is where the magic begins, so let’s get our hands a little dirty, shall we?
First things first, it’s essential to understand that we won’t be planting entire garlic bulbs. Nope, we’re going to break them down into individual cloves. 🧄 These cloves are like tiny garlic seeds, each capable of growing into a full bulb.
Now, let’s pop those cloves out of the bulb. Gently use your thumb to separate them while preserving that papery skin. That skin acts as a protective layer for our garlic. Don’t worry if some cloves are smaller; they can still be planted. In fact, you can experiment with those smaller cloves in a separate container, and they’ll sprout green garlic, a culinary delight with a garlic twist. 🌱🍴
Pro tip: Remember to plant your cloves with the pointy side up. This is where the sprouts will emerge. Planting them upside down would be like sending them on a confusing journey, and we want our garlic to grow strong and true!
As for depth, aim for about 3 to 4 inches deep. Create a little nest in the soil, tuck your clove in with the pointy side up, and cover it up with soil. Now, let’s talk spacing. Garlic doesn’t enjoy competition, so give each clove some room to breathe. A spacing of at least 6 inches apart is ideal.
For row-to-row spacing, it depends on your preferences. You can go with a tighter spacing for a denser garlic bed, or you can spread them out a bit for extra airflow and disease prevention. It’s entirely up to you.
Mulching for Garlic Protection
Now that our garlic cloves are snug in the soil, it’s time to give them some extra love and protection through mulching. 🌾
Mulching serves a dual purpose: it keeps the soil moist and prevents excessive heat from reaching our precious garlic. In a warmer climate, like mine in sunny San Diego, this can make all the difference.
For mulch, I prefer using a light-colored, shredded straw. It reflects heat, which is precisely what our garlic needs to avoid during the early stages of growth. Apply about 3 inches of mulch across your garlic bed, and you’ll have happy garlic bulbs in the making.
With your cloves planted and tucked in under that cozy mulch blanket, you’re well on your way to growing garlic like a seasoned pro. So, what’s next for your garlic crop? Stick around because we’ll dive into how to nurture your growing garlic and what to expect when it’s time to harvest. 🌱🚀
Nurturing Your Growing Garlic
Now that we’ve planted our garlic cloves and given them a warm bed with a cozy mulch cover, it’s time to talk about nurturing your growing garlic. This phase is where your loving care makes all the difference in the world. 🌱💚
Caring for Your Garlic
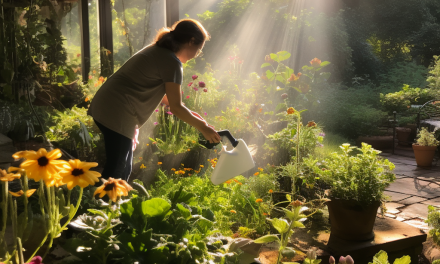
In the coming months, your garlic will begin to sprout and develop its lush green leaves. During this time, you’ll want to ensure it receives the right amount of water and nutrients. Garlic loves consistent moisture, but it despises being waterlogged. So, be sure to keep the soil evenly moist but not soggy. A good rule of thumb is to water when the top inch of soil feels dry.
As for nutrients, garlic is a bit of a nutrient hog, particularly when it comes to nitrogen. To keep those garlic shoots growing strong, consider adding a balanced fertilizer that’s low in nitrogen but higher in phosphorus and potassium. This will encourage robust root development and healthy bulb formation. Pro tip: Fertilize sparingly to avoid overfeeding.
Looking Ahead to Harvest
As your garlic plants continue to thrive, they’ll go through various growth stages. The anticipation will build as you watch those garlic scapes curl and twist. 🌱 These scapes are delicious, by the way! Don’t forget to use them in your cooking. But what we’re really waiting for are those beautiful garlic bulbs below the soil.
Garlic is typically ready for harvest when about 50% to 60% of the leaves have turned brown. This usually occurs in late spring or early summer, depending on your local climate. When you notice this change, it’s time to carefully dig up your garlic bulbs.
To harvest, gently loosen the soil around the bulbs with a fork, being careful not to damage them. Once you’ve unearthed those treasures, lay them out to dry in a well-ventilated, shaded area for a couple of weeks. This curing process allows the outer layers to dry, ensuring a longer shelf life for your garlic.
And there you have it! With the right care and patience, you’ll be rewarded with your very own homegrown garlic, bursting with flavor and ready to elevate your culinary creations.
No need to wait for the next section or wonder what’s coming next; we’re covering all the essential steps in one comprehensive guide. 🌱 Keep the gardening love alive and stay with me as we conclude our journey into the world of garlic.
Conclusion
So there you have it, my fellow gardeners, a comprehensive guide to growing garlic that covers everything from selecting the right garlic variety to nurturing your crop and harvesting those flavorful bulbs. 🧄🌱
Remember, garlic gardening can be both rewarding and fun, and with a little patience and some tender loving care, you’ll soon be enjoying the fruits (or should I say bulbs?) of your labor in your own kitchen.
Before I sign off, don’t forget to check out the garlic varieties we offer in our store, ready to be shipped to your doorstep for your next gardening adventure. 📦🌿
Thank you for joining me on this garlic-growing journey. Your passion for gardening warms my heart, and I’m here to support you every step of the way. Happy gardening, my friends! 🌱🌟
Amazon and the Amazon logo are trademarks of Amazon.com, Inc, or its affiliates.AMAZON AFFILIATE DISCLOSURE The Garden Whisperer Tips blog is a participant in the Amazon Services LLC Associates Program, an affiliate advertising program designed to provide a means for sites to earn advertising fees by advertising and linking to Amazon.com. As an Amazon Associate, we earn from qualifying purchases. Some of the links on this blog are affiliate links, and if you go through them to make a purchase, we will earn a commission at no extra cost to you. AFFILIATE MARKETING AND ADVERTISEMENT TRANSPARENCY At Garden Whisperer Tips, we believe in full transparency with our readers. We participate in multiple affiliate marketing programs, and some of the links on this blog may be affiliate links. This means we may earn a commission if you click on the link or make a purchase using the link. We also host advertisements on our blog, which helps us generate revenue. Rest assured, our editorial content is not influenced by advertisers or affiliate partnerships.


