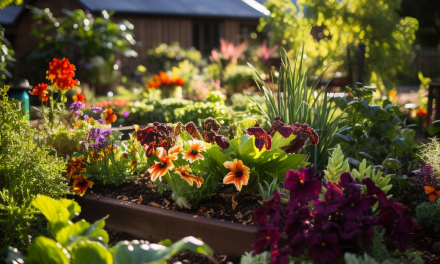
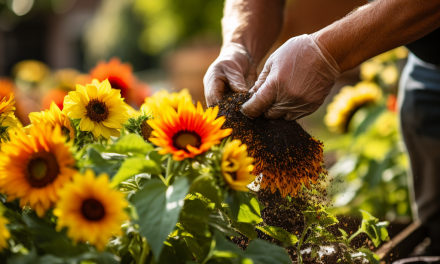
Welcome to the world of gardening and sustainable living! I’m Gayle the Gardener, and in this comprehensive guide, we’re going to demystify the art of composting. Whether you’re a seasoned gardener looking to boost your soil’s fertility or a complete novice eager to reduce waste and enrich your garden, you’ve come to the right place.
The Magic of Composting
Composting is like turning kitchen scraps and garden waste into pure gold for your plants. It’s a natural process that not only nourishes your garden but also reduces the burden on landfills, making it an environmentally friendly practice. The best part? You don’t need a green thumb or a degree in environmental science to get started.
So, if you’re ready to embark on a rewarding journey of composting, let’s dive in. By the end of this post, you’ll have all the knowledge and confidence you need to become a composting pro. We’ll cover everything from setting up your composting system to troubleshooting common issues along the way.
But first, let’s roll up our sleeves and discover the wonders of composting together. Shall we?
Setting Up Your Composting System
Now that you’re eager to venture into the world of composting, let’s start by setting up your very own composting system. Don’t worry; it’s easier than you might think, and I’m here to guide you every step of the way.
Choose Your Composting Method
There are several methods for composting, each with its unique advantages. Let’s explore a few:
Traditional Compost Bin: This classic method involves using a dedicated bin or pile in your garden. It’s cost-effective and allows you to create rich compost over time. I recommend this method for beginners.
Compost Tumbler: If you prefer a more controlled and faster composting process, consider investing in a compost tumbler. It makes turning the compost a breeze and accelerates decomposition.
Vermicomposting: For those with limited space, vermicomposting with worms in a bin is a fantastic option. Worms are nature’s composting experts and can turn kitchen scraps into nutrient-rich castings.
Step-by-Step Setup
Let’s get your chosen composting system up and running:
Select a Location: Find a suitable spot in your garden or yard for your composting setup. It should have good drainage and be easily accessible year-round.
Gather Materials: You’ll need a mix of “green” (nitrogen-rich) and “brown” (carbon-rich) materials. Greens include kitchen scraps like fruit and vegetable peels, while browns can be dry leaves, straw, or shredded newspaper.
Layering: Begin with a layer of browns at the bottom of your compost bin or pile. Then, add a layer of greens. Continue layering, making sure to keep the balance of greens and browns.
Aerate and Water: Regularly turn or aerate the compost to introduce oxygen, which speeds up decomposition. Keep the compost moist, similar to a wrung-out sponge, but not soggy.
Patience Is Key: Composting is a slow process, but it’s worth the wait. Depending on the method and conditions, you can expect usable compost in a few months to a year.
Ready to Roll
With your composting system in place, you’re well on your way to creating “black gold” for your garden. In the next section, we’ll dive into what materials you can and cannot compost, ensuring your compost pile thrives.
What to Compost: Turning Scraps into Garden Gold
Now that your composting system is up and running, it’s time to delve into what you can toss into the mix and what’s better left out. Properly balancing your compost ingredients is key to producing nutrient-rich compost for your garden.
The Greens and Browns
In the world of composting, we categorize materials into two main groups: “greens” and “browns.” Understanding this balance is fundamental.
Greens (Nitrogen-Rich):
- Kitchen Scraps: Fruit and vegetable peels, coffee grounds, eggshells, and tea bags.
- Garden Waste: Grass clippings, plant trimmings, and spent flowers.
- Manure (in moderation): Chicken, horse, or cow manure can add valuable nutrients.
Browns (Carbon-Rich):
- Dry Leaves: Gather fallen leaves from your yard or neighborhood.
- Straw or Hay: These materials add bulk and help with aeration.
- Shredded Newspaper or Cardboard: Excellent for carbon content.
What Not to Compost
Avoid these items to maintain a healthy compost pile:
- Meat and Dairy: These can attract pests and slow down decomposition.
- Fats and Oils: They don’t break down well and can create odors.
- Pet Waste: Pet feces can contain harmful pathogens.
- Diseased Plants: Infected plants may introduce diseases into your compost.
Pro Tips for Composting Success
Chop or Shred: Smaller pieces decompose faster. Chop up large items like melon rinds or break down cardboard.
Mix It Up: Regularly turn your compost to aerate and distribute microbes evenly.
Maintain Moisture: Keep your compost as damp as a wrung-out sponge.
Layer It: Alternate between greens and browns for optimal balance.
A Recipe for Success
Creating a successful compost pile is like crafting a recipe, and you’re the chef. By following these guidelines and maintaining the right balance of greens and browns, you’ll soon be producing “black gold” that your garden will thrive on.
Troubleshooting Common Composting Issues
As you continue your composting journey, it’s not uncommon to encounter a few bumps along the way. But don’t worry, Gayle the Gardener is here to help you navigate through common composting challenges and keep your garden’s “black gold” production on track.
Odor Woes
Issue: Unpleasant odors emanating from your compost pile.
Solution: Foul odors often result from too much moisture or an imbalance in your compost mix. To combat this issue:
- Add more brown materials to restore the balance.
- Turn the pile to aerate and introduce oxygen.
- Ensure your compost pile is well-drained to prevent excess moisture.
Unwanted Visitors
Issue: Pests like flies or rodents taking an interest in your compost.
Solution: It’s essential to discourage unwanted guests:
- Avoid composting meat, dairy, or oily foods that attract pests.
- Use a secure lid or cover on your compost bin to keep critters out.
- Bury food scraps under a layer of browns to deter scavengers.
Slow Decomposition
Issue: Your compost pile is taking longer to decompose than expected.
Solution: Patience is key in composting, but if you’re facing delays:
- Ensure a proper balance of greens and browns in your compost.
- Maintain the right moisture level (like a damp sponge, not too wet or dry).
- Regularly turn your compost to aerate and speed up decomposition.
The Art of Troubleshooting
Remember, troubleshooting is part of the composting journey. By identifying and addressing these issues promptly, you’ll maintain a healthy compost pile that provides rich nutrients for your garden.
Embarking on Your Composting Journey
Congratulations on making it this far in your composting adventure! By now, you’ve learned the ins and outs of composting, from setting up your composting system to troubleshooting common issues. It’s time to wrap up this guide with some words of encouragement and inspiration.
Your Garden’s Future
As you venture into the world of composting, remember that you’re not just creating nutrient-rich soil for your garden; you’re contributing to a greener, more sustainable world. Each kitchen scrap and garden waste you compost is a small step towards reducing waste in landfills and enriching the earth.
Share Your Experience
I encourage you to share your composting journey with friends, family, and fellow garden enthusiasts. Composting is not only about creating healthy soil but also about fostering a sense of community and sustainability. Your experiences and tips can inspire others to start their own composting adventures.
Keep Learning
Composting is an ever-evolving process. There’s always something new to learn and discover. Stay curious, read more about composting techniques, and adapt your practices to suit your unique garden and climate. Experiment, learn from your mistakes, and celebrate your successes.
The Future Is Green
In closing, I want to thank you for joining me on this composting journey, Gayle the Gardener style. Your dedication to sustainable gardening practices is commendable, and your garden will undoubtedly reap the benefits.
Now, armed with knowledge, enthusiasm, and a bit of patience, you’re ready to turn those kitchen scraps into “black gold” for your garden’s future. So go ahead, dig in, and let your composting adventure begin!
If you have any questions or want to share your composting experiences, feel free to leave a comment below. I’m here to support you every step of the way.
Happy composting!
Amazon and the Amazon logo are trademarks of Amazon.com, Inc, or its affiliates.AMAZON AFFILIATE DISCLOSURE The Garden Whisperer Tips blog is a participant in the Amazon Services LLC Associates Program, an affiliate advertising program designed to provide a means for sites to earn advertising fees by advertising and linking to Amazon.com. As an Amazon Associate, we earn from qualifying purchases. Some of the links on this blog are affiliate links, and if you go through them to make a purchase, we will earn a commission at no extra cost to you. AFFILIATE MARKETING AND ADVERTISEMENT TRANSPARENCY At Garden Whisperer Tips, we believe in full transparency with our readers. We participate in multiple affiliate marketing programs, and some of the links on this blog may be affiliate links. This means we may earn a commission if you click on the link or make a purchase using the link. We also host advertisements on our blog, which helps us generate revenue. Rest assured, our editorial content is not influenced by advertisers or affiliate partnerships.


