
Introduction
Hello, my lovely readers! 🌸
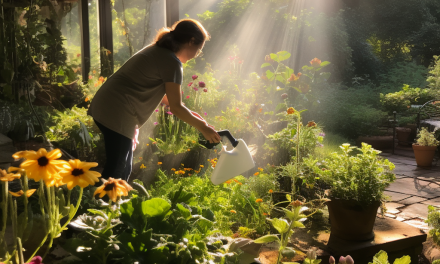
I hope you’re all doing wonderfully. Today, I have something extra special to share with you. You know how much I adore gardening—it’s like therapy for the soul, isn’t it? 🌱 Well, I’ve been experimenting with a fantastic and super accessible way to garden that I think you’re going to love.
Have you ever thought about creating a raised bed garden but felt overwhelmed by the idea of building one from scratch? Or maybe you’re short on space but still dream of growing your own little oasis? If so, you’re in the right place!
Today, we’re diving into the world of Raised Bed Gardening in a Tote. Yes, you read that right—a tote! It’s simple, it’s efficient, and best of all, it’s something anyone can do. So grab a cup of tea, settle in, and let’s get our hands a little dirty, shall we? 🌿
Why Choose a Tote for Your Raised Bed? 🤔
Ah, the humble tote. You’ve probably used it for storage, maybe even for moving. But have you ever considered it as a vessel for your garden dreams? 🌻
Food-Safe First! 🍎
The first thing you need to know is that not all totes are created equal. If you’re going to grow food in a plastic container, you must make sure it’s food-safe. Look for a symbol on your container that has numbers between 1 and 7. Specifically, numbers 2, 4, and 5 are your go-to for safe growing. This is crucial, my friends, because the last thing we want is to compromise the quality of our beautiful plants.
Why Totes Over Traditional Beds? 🌱
You might be wondering, “Why would I use a tote when I could build a traditional raised bed?” Well, totes offer a few unique advantages:
- Portability: You can easily move your garden around. Perfect if you’re renting or have limited space.
- Ease of Setup: No hammers, no nails, just you and your green thumb.
- Cost-Effective: Often cheaper than building a wooden or steel raised bed.
So, whether you’re a gardening newbie or just looking for a simpler way to grow, a tote could be your new best friend in the garden.
Preparing Your Tote for Planting 🛠️
Alright, so you’ve got your food-safe tote and you’re eager to transform it into a mini-garden paradise. But before we get to the planting, there are a couple of essential steps to ensure your tote is ready for its new role.
Drilling for Drainage 🌧️
First things first, we need to make sure our tote can drain well. Trust me, your plants will thank you for this. Grab a drill and a half-inch drill bit, and drill about six holes at the bottom of your tote. This will prevent water from sitting at the bottom and going stagnant. Remember, roots need oxygen to grow, so proper drainage is a must!
Why Good Drainage Matters 🌱
You might be thinking, “Why is drainage so important?” Well, let me tell you, poor drainage can lead to root rot, and we definitely don’t want that. Good drainage ensures that your plant roots get the oxygen they need while also preventing waterlogged soil. It’s a win-win!
So, you’ve got your tote all prepped and ready, but what goes inside is just as important. The soil you choose can make or break your garden, so let’s get it right, shall we?
Types of Soil: Bagged or Homemade? 🌍
You have two main options when it comes to soil: bagged soil from the store or homemade soil. While bagged soil is convenient, making your own soil gives you control over its composition. Plus, it’s incredibly rewarding to know you’ve created the very foundation your plants will grow in.
Crafting Your Own Soil Mix: A Detailed Guide 🌿
Creating your own soil mix is like cooking; you can adjust the ingredients to suit your specific needs. But before you start experimenting, it’s good to have a basic recipe. Here’s a more detailed look at each component of our recommended soil mix:
Coco Coir: The Base 🥥
Coco coir is made from the husk of coconuts and serves as the base of your soil mix. It’s excellent for water retention and provides good aeration for the roots. Three buckets of coco coir will give your soil mix the fluffiness it needs while helping to retain moisture.
Why Coco Coir Over Peat Moss? Coco coir is pH neutral, which means it won’t make your soil too acidic or alkaline. It also has better water retention properties compared to peat moss, making it a superior choice for most gardeners.
Mushroom Compost: The Nutrient Provider 🍄
Mushroom compost is rich in organic matter and provides essential nutrients to your plants. Two buckets will enrich your soil mix, making it fertile and well-drained.
Note: Mushroom compost can sometimes be nutrient-depleted as it’s already been used to grow mushrooms. However, it still makes an excellent soil conditioner.
Vermiculite: For Water Retention 💧
Vermiculite is a natural mineral that expands when heated. It’s used to improve water retention and aeration. A half bucket will suffice to keep your soil moist but not waterlogged.
Perlite: For Aeration 🌬️
Perlite is a volcanic glass that’s heated until it pops, resulting in a lightweight, porous material. It’s great for improving aeration and drainage. Adding a half bucket to your mix will ensure that your plants’ roots have plenty of room to breathe.
Mixing It All Together 🔄
Once you’ve gathered all your ingredients, it’s time to mix. Lay out a large tarp on a flat surface and pour each component onto it. Use a rake or your hands to mix everything together thoroughly.
Pro Tip: To make sure the ingredients are well-incorporated, lift the corners of the tarp and let the mixture tumble together. Repeat this a few times for a well-mixed soil.
The Importance of Fertilizer 🌼
Whether you opt for bagged or homemade soil, adding a balanced, all-purpose fertilizer is key. Sprinkle it on the top layer of the soil and mix it into the top few inches. This will give your plants the nutrients they need to thrive.
Testing Soil Structure 🌱
Once your soil is ready, here’s a quick test to check its structure: Squeeze a handful of soil into a ball. If it holds its shape but crumbles easily when you touch it, you’ve hit the jackpot! This means your soil has good water retention and drainage—exactly what we want.
Fertilizing Your Soil 🌿
Ah, fertilizer—the magic potion that can turn your garden from good to great. But it’s not just about sprinkling some here and there; it’s about knowing what your plants need and when they need it.
The All-Purpose Magic ✨
For a garden as diverse as a tote garden, an all-purpose fertilizer is your best bet. It’s balanced, easy to use, and takes the guesswork out of fertilizing. Simply sprinkle it over the top layer of your soil and mix it into the top few inches.
Pro Tip: Always follow the instructions on the fertilizer package to avoid over-fertilizing. Too much of a good thing can actually harm your plants.
Timing is Everything ⏰
When should you fertilize? Well, if you’re using a slow-release fertilizer, applying it at the time of planting is usually sufficient for the entire growing season. However, if you notice your plants looking a bit lackluster as the season progresses, a mid-season boost might be in order.
Organic vs. Synthetic 🌱
You might be wondering whether to go for organic or synthetic fertilizers. Organic fertilizers are made from natural sources and are less likely to burn your plants. They also improve soil structure over time. Synthetic fertilizers offer quick, targeted nutrition but can be harsh on the soil and plants if not used carefully.
Watering After Fertilizing 💦
Once you’ve applied your fertilizer, don’t forget to water it in. This helps to distribute the nutrients evenly throughout the soil, ensuring that your plants get all the goodness they need.
And there you have it! Your guide to fertilizing your tote garden. Your plants are going to thank you, I promise. 🌸
Planting Your Spring Garden in a Tote 🌸
Finally, the moment we’ve all been waiting for! With your tote prepped and your soil enriched, it’s time to bring your garden to life. Let’s talk about what to plant and how to plant it.
Choosing Your Plants 🌱
For a spring garden, you’ll want to focus on cool-season crops and flowers. Here are some great options:
- Cauliflower
- Swiss Chard
- Lettuce
- Radishes
- Cabbage
- Chamomile
Layout and Spacing 📏
When planting in a confined space like a tote, layout is crucial. Start by placing taller plants like cauliflower in one corner, and shorter plants like lettuce in the opposite corner. This ensures that each plant gets the sunlight it needs without overshadowing its neighbors.
Pro Tip: Plant chamomile or another flowering herb in the center as a beautiful and functional centerpiece. It will not only look lovely but also attract beneficial insects.
The Planting Process 🌿
- Dig a Hole: Make a hole in the soil about as deep as the root ball of your plant.
- Add Fertilizer: Sprinkle a little all-purpose fertilizer into the hole.
- Place the Plant: Gently place your plant in the hole.
- Cover and Pat: Cover the root ball with soil and gently pat it down.
- Water: Give your newly planted friend a good drink of water.
Direct Sowing Seeds 🌱
For plants like radishes, you can directly sow the seeds into the soil. Make small holes about an inch deep and place a couple of seeds in each. Cover them with soil and water gently.
Keep an Eye on Growth 🌱
Once everything is planted, your main job is to keep an eye on the soil moisture and watch your plants grow. If the soil feels dry to the touch, it’s time to water
Caring for Your Tote Garden 🌼
You’ve done the hard work, and now it’s time to sit back and watch your garden grow, right? Well, not quite. A garden is like a pet; it needs regular care and attention. Here’s how to keep your tote garden happy and healthy.
Watering Essentials 💦
Watering is crucial, but overwatering can be as harmful as underwatering. The key is to keep the soil moist but not waterlogged. A good rule of thumb is to water when the top inch of soil feels dry to the touch.
Pro Tip: Water in the early morning or late afternoon to minimize water loss due to evaporation.
Thinning and Pruning ✂️
As your plants grow, you may need to thin out some, like radishes, to ensure they have enough space. For larger plants like cauliflower and cabbage, pruning any dead or yellow leaves can help the plant focus its energy on new growth.
Pest Control 🐛
Ah, the uninvited guests! If you notice your plants are taking some damage, consider using a natural pesticide like BT (Bacillus thuringiensis) to combat common pests like cabbage worms.
Fertilizing: Round Two 🌱
Remember that mid-season boost we talked about? If your plants seem to be slowing down or their leaves are losing color, it might be time for another round of fertilizer. Just like the first time, sprinkle it on top and water it in.
Harvest Time! 🌾
The most rewarding part of gardening is, of course, the harvest. For leafy greens like lettuce and Swiss chard, you can start harvesting when the leaves are young and tender. For root vegetables like radishes, a peek into the soil will usually tell you if they’re ready to be pulled.
Conclusion: The Joy of Tote Gardening 🌱
There you have it, my dear gardening friends—a complete guide to creating your very own spring garden in a tote. From preparing your tote and selecting the right soil, to planting and caring for your mini-garden, we’ve covered it all. 🌸
Gardening in a tote is more than just a space-saving solution; it’s a testament to the incredible versatility and resilience of nature—and of us gardeners too! Whether you have a sprawling backyard or just a tiny balcony, there’s nothing stopping you from cultivating your own little patch of heaven. 🌼
Thank you for joining me on this gardening journey. I can’t wait to hear all about your tote gardening adventures. Remember, the best garden is the one you’ll enjoy tending, so go ahead and make it your own. 🌱
Happy Gardening! 🌿
And that wraps up our comprehensive guide to tote gardening. I hope you found it both informative and inspiring. Now, go get your hands dirty and your heart full. 🌱💖
Would you like to add anything else, or does this conclude our gardening adventure for today? 🌼
Amazon and the Amazon logo are trademarks of Amazon.com, Inc, or its affiliates.AMAZON AFFILIATE DISCLOSURE The Garden Whisperer Tips blog is a participant in the Amazon Services LLC Associates Program, an affiliate advertising program designed to provide a means for sites to earn advertising fees by advertising and linking to Amazon.com. As an Amazon Associate, we earn from qualifying purchases. Some of the links on this blog are affiliate links, and if you go through them to make a purchase, we will earn a commission at no extra cost to you. AFFILIATE MARKETING AND ADVERTISEMENT TRANSPARENCY At Garden Whisperer Tips, we believe in full transparency with our readers. We participate in multiple affiliate marketing programs, and some of the links on this blog may be affiliate links. This means we may earn a commission if you click on the link or make a purchase using the link. We also host advertisements on our blog, which helps us generate revenue. Rest assured, our editorial content is not influenced by advertisers or affiliate partnerships.


